Introduction:
Parking sensors have become an essential feature in modern vehicles, providing drivers with peace of mind while squeezing into tight spaces. However, when these sensors malfunction or need replacing, removing them from the bumper can be a daunting task. Embrace this comprehensive guide as we delve into the intricate process of extracting parking sensors from your vehicle’s bumper, empowering you with the knowledge and confidence to tackle this automotive challenge.
Image: www.reddit.com
Step-by-Step Instructions:
-
Safety First: Park your car in a safe location, engage the parking brake, and disconnect the negative terminal of the battery to ensure electrical safety.
-
Identify Sensor Locations: Locate the parking sensors on the bumper. They are typically small, round, or oval-shaped objects embedded within the bumper cover.
-
Remove Bumper Cover: Consult your vehicle’s service manual for specific instructions on removing the bumper cover. In most cases, you will need to remove bolts or screws along the edges of the bumper cover, disconnect any electrical connectors for lights or sensors, and carefully pull the bumper cover away from the underlying bumper reinforcement.
-
Locate Sensor Wiring: Once the bumper cover is removed, trace the sensor wires from the sensors to the control module. The control module is often located behind the bumper reinforcement or inside the trunk.
-
Disconnect Sensor Wires: Unplug the sensor wires from the control module. Make sure to take note of which sensor wire corresponds to which sensor to ensure proper reinstallation later.
-
Remove Sensors: Once the sensor wires are disconnected, carefully pry each sensor out of the bumper using a flat-head screwdriver or a plastic trim removal tool. Avoid using excessive force to prevent damage to the sensors.
-
Clean Bumper and Sensors: Wipe down the bumper surface and the sensors with a damp cloth to remove any dirt or debris that may have accumulated during the removal process.
-
Inspect Sensors: Inspect the sensors for any cracks, chips, or other damage. If any damage is found, replace the faulty sensor with a new one.
Expert Insights and Actionable Tips:
From Automotive Expert, Mark Johnson:
- “When removing bumper sensors, pay close attention to the wiring harness. Mishandling the wires can lead to electrical problems down the road.”
Tips for Optimal Results:
-
If you are not comfortable removing the bumper cover yourself, consider seeking professional assistance from a mechanic.
-
Invest in a quality trim removal tool to avoid scratching or damaging the bumper cover during removal.
-
Take your time and follow the instructions carefully to ensure a successful repair.
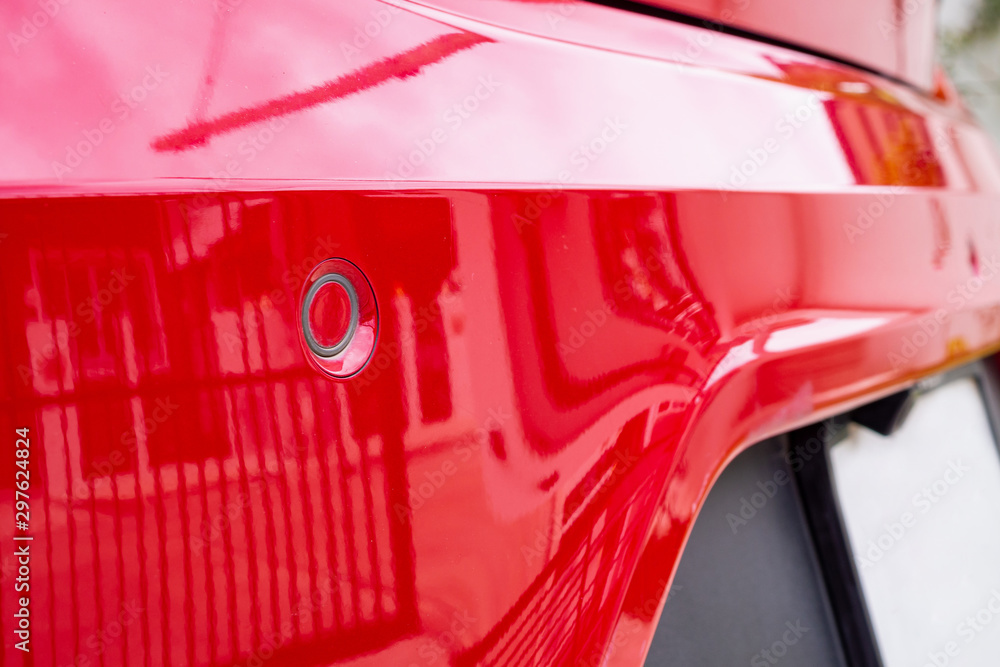
Image: stock.adobe.com
How To Remove Parking Sensors From Bumper
Conclusion:
Congratulations! By following these detailed instructions, you have successfully mastered the art of removing parking sensors from your vehicle’s bumper. This practical skill will not only save you time and money but also provide peace of mind in the event of sensor malfunctions or replacement needs. Remember to approach this task with patience and precision, and your vehicle will thank you for the care and attention you have paid to its maintenance. As always, when embarking on any automotive repair, prioritize safety and consult reputable sources for accurate information.
